The cicadas were singing harmonies and the fireflies were just coming out as I piddled around in our garden early Saturday evening. Our spinach already bolted a few weeks ago and our lettuce is in its waning stages, but some of the later summer vegetables are really kicking into high gear, like yellow squash, zucchini and eggplant. I’ve currently got four zucchini, six eggplant and five yellow squash, and that’s just on the vine!
Between our CSA share with Wynn Family Farm and the bounty our home garden is providing us, we’ve eaten some stuff over the past couple of months that you just can’t find at your average grocer: flowering broccoli, giant white radishes, Ichiban eggplant, green garlic, baby purple potatoes, broccoli greens, frilly endive, the list goes on and on. In an effort to let nothing go to waste, we’ve tried to integrate all these vegetables into pretty much every meal: veggie scrambled eggs for breakfast, countless – countless! – veggie tacos for lunch and elaborate salads for dinner. I’ve also become proficient in “putting up” vegetables – from what I gather, this is an archaic term Hubby inherited from his live-off-the-land grandmother, which means to store vegetables for use in the later part of the year; I call it “freezing”.
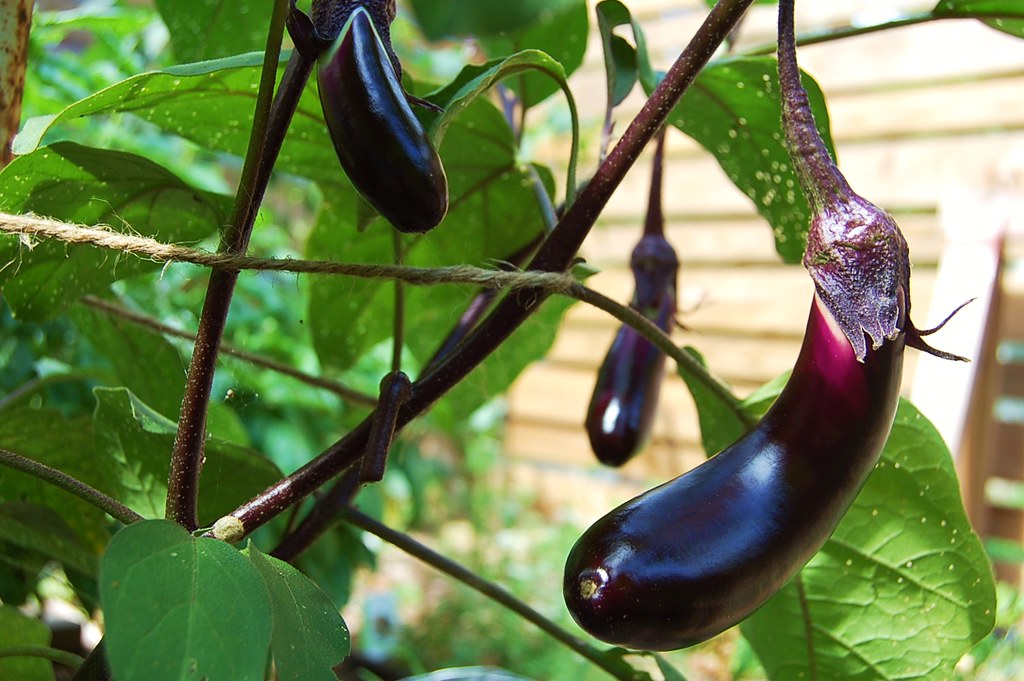
Ichiban Eggplant
Every year, I have at least one straight neck yellow squash plant and one zucchini plant in the garden (remember my squash fritters from last year? A new plant in my garden this year is Ichiban eggplant: a thin, tender skin eggplant with sweeter flesh and a less bitter taste than its more bulbous cousin. The plant produces a modest purple flower, followed by a sleek, slender, shiny fruit. They’re ready to pick when the eggplant has lost most of its intense shine.
So with Saturday night’s garden pickings – including two eggplant, one zucchini and a bouquet of basil – I began brainstorming. Hubby had on his “Summer Menu Wish List” (yes, such a thing exists around our house) eggplant parmesan. Not so tough, right? But being my usual ambitious, one-upping self, I came up with a recipe that took plain ol’ eggplant parmesan to the next level.
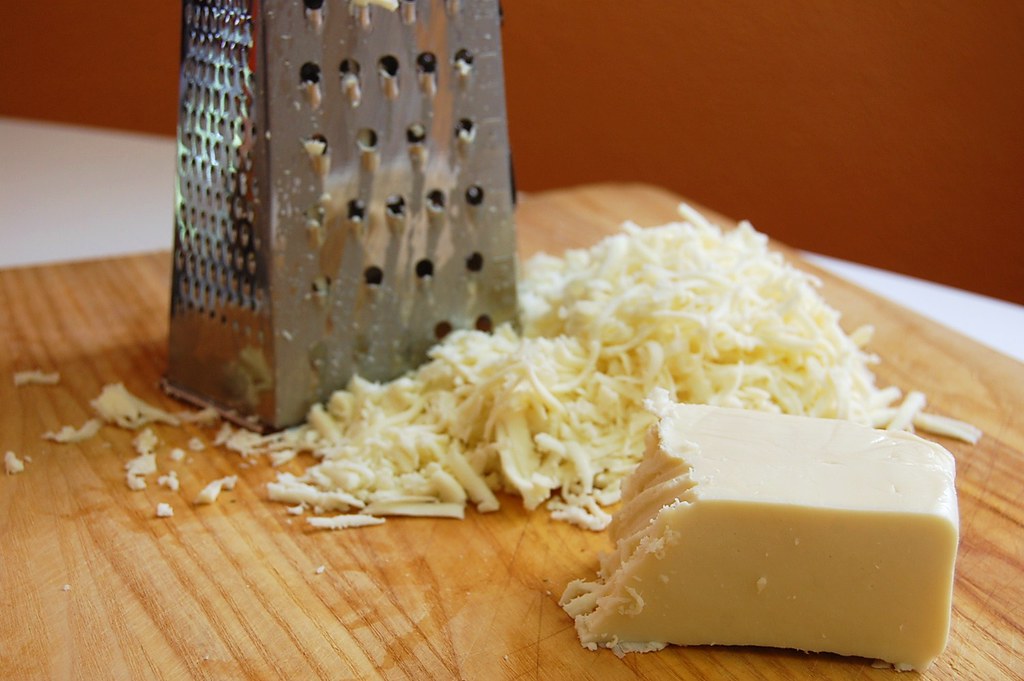
Shredding Mozzarella
Not only did I use the eggplants from the garden, but I used the zucchini as well. Roughly similar in size and texture, I thought the combination would make for a much more interesting dish. In keeping with the pseudo-Japanese theme of my Ichiban eggplant, I used Panko breadcrumbs to coat the veggies before frying them. Trying not to eat all the fried veggies before they go into the dish is a mighty tough feat, and one I just barely accomplished – although a few stragglers managed to disappear…
A common ingredient in eggplant parmesan is ricotta cheese: a slightly grainy, soft cheese that’s made from the leftover whey in the cheese making process. For this dish I used whole milk ricotta – I mean, hey, if you’re gonna go all out, go all out, right? But I didn’t stop there; I took a hefty handful of basil and a few cloves of garlic and mixed them together with the ricotta to make an exponentially more flavorful cheese.
The second cheese featured in this dish is good ol’ mozzarella. Now, I know the pre-shredded stuff at the store is awfully handy, but for the love of all that is holy, please don’t use the stuff for baking. Pre-shredded cheese contains anti-caking agents, which prevent the cheese from melting properly, leaving you with a powdery, disappointingly un-melty cheese. Buy a block of whole milk mozzarella, roll up your sleeves, and get to shredding. You’ll end up with beautifully melted cheese and toned triceps. Trust me, here. It’s worth it.
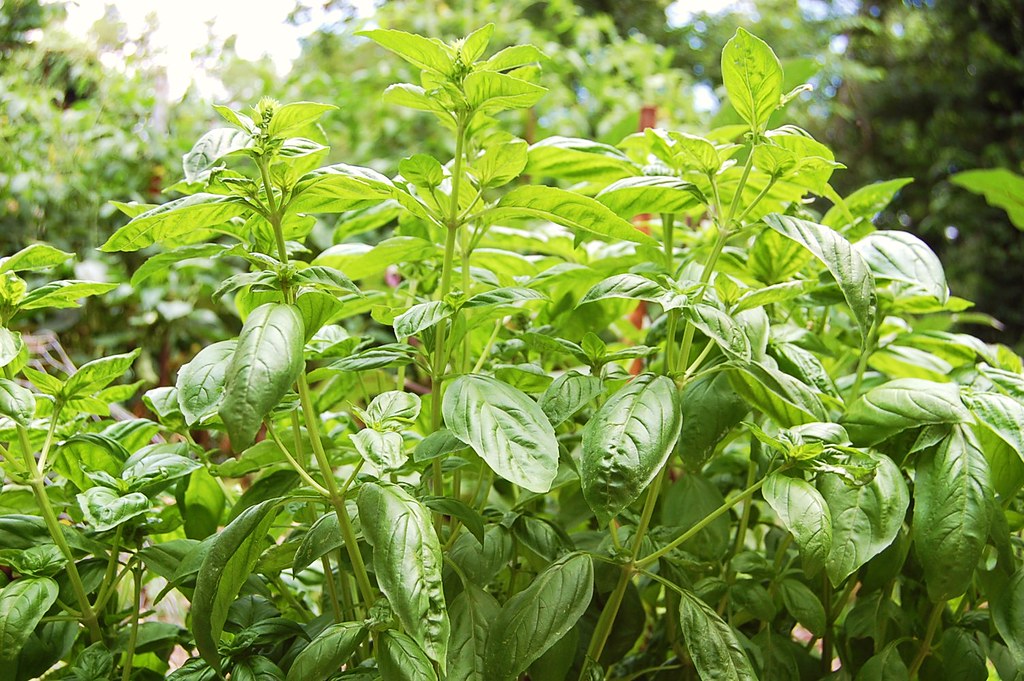
Garden Basil
Now, the sauce – before you deliver that collective gasp as I tell you I use the jarred stuff for this dish, let me tell you why. With a dish like this, the tomato sauce is a mere component rather than the shining star. A good quality jar of tomato sauce will suffice just fine; I like Barilla, because it’s the only brand of sauce that I’ve seen in grocery stores in Italy, as well. Use your personal favorite, and it’ll save you time and effort that you could be wasting on other things, like Googling yourself or watching Wipeout.
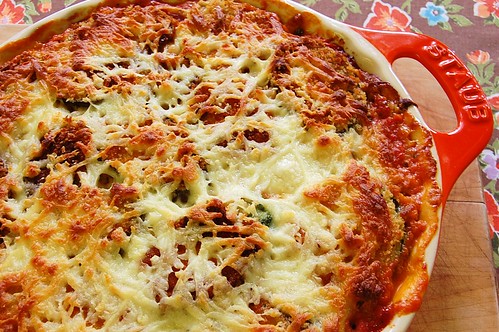
After an easy assembly, the dish went into the oven for about an hour, give or take a few minutes. The result was gooey, melty and crunchy – and off my plate and in my belly in less than five minutes. The basil in the ricotta adds a fresh kick, and the Panko on the eggplant and zucchini stayed crispy and delicious. As I always say, feel free to experiment, using different veggies or flavorings for the ricotta. Enjoy!
Like what you’re reading? Join me on Facebook for daily Foodie inspiration and to share your own culinary creations. Come on, it’s fun! Find me at facebook.com/flyerfoodie.
Eggplant & Zucchini Parmesan
2 small eggplant, sliced 1/2″ thick
1 large zucchini, sliced 1/2″ thick
3 eggs, whisked
1 c. flour
2 c. Panko breadcrumbs
1/2 c. canola oil
1 (15 oz.) tub of whole milk ricotta
1 c. packed basil leaves
2 cloves garlic, roughly chopped
1 jar favorite tomato sauce
1 lb. whole milk mozzarella, grated
salt & pepper
Heat the oven to 350°.

Dredging Ingredients
Set up a dredging station by lining up three bowls: one for flour, one for egg and one for breadcrumbs. Season the flour, egg and breadcrumbs with salt and pepper. Dredge each vegetable slice, first in the flour, then the egg, then the breadcrumbs, and place them on a cookie sheet. In a large sauté pan, heat the canola oil. Fry the battered vegetables, turning them once and keeping a close eye on them to avoid burning. Place the fried vegetables on a draining tray and set aside.
In the bowl of a food processor, combine the ricotta, basil and garlic, and season with salt and pepper. Mix the ingredients on high about a minute, stopping once or twice to scrape down the sides of the mixing bowl. Set aside.
In a deep baking dish, begin by spreading 2 tablespoons of tomato sauce in the bottom. Place half the fried eggplant and zucchini in a single layer over the sauce. Spread the basil ricotta over the vegetables, followed by the grated mozzarella, followed by the tomato sauce. Repeat the layers in the dish until it’s filled and top with any remaining mozzarella.
Bake for about an hour (check on it periodically), until the cheese is melted and browned, and the sides are bubbling. Allow the dish to sit for 15 minutes before serving.
* If the above slideshow doesn’t load, you can view all of the photos on our Flickr page.
Laura Hobbs is a regular contributor for the Fayetteville Flyer. She was born and raised in Fayetteville. She is a self-proclaimed foodie and avid cook. For more of Laura’s contributions, see her author page or visit Flyer Foodie on Facebook.